Gateway cloning in SnapGene tutorial
Go to parent SnapGene
SnapGene has a list of Gateway cloning vectors on its website.
As an example we want to clone the Rab5 CDS into Arabidopsis using a plant vector, pearleyGate 103. The sequence of the vector is available from SnapGene's list of plant vectors. The vector contains a GFP gene which will be fused to the C-terminus of Rab5.
The file containing the vector is available in the folder /Documents/SnapGene . Load the sequence in SnapGene.
Contents
Clone fragment into donor vector
The first step is to clone the Rab5 fragment into a donor vector using the BP reaction. Open the mRFP1Rab5 vector as it is the source of the insert.
Open the cloning editor
| Open the cloning editor |
|---|
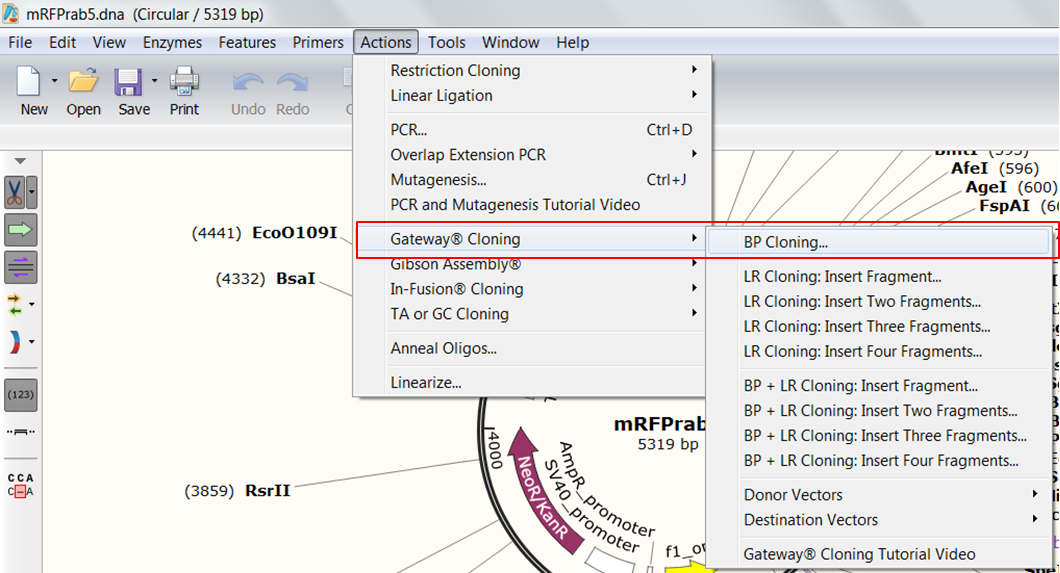
| Expand Actions in the top menu, select Gateway Cloning and then BP Cloning. |
Select the insert
The cloning editor opens on the attB fragment tab where the vector that was loaded when you opened the cloning editor (mRFP1Rab5) is automatically opened as the source of the insert.
| Select the insert |
|---|
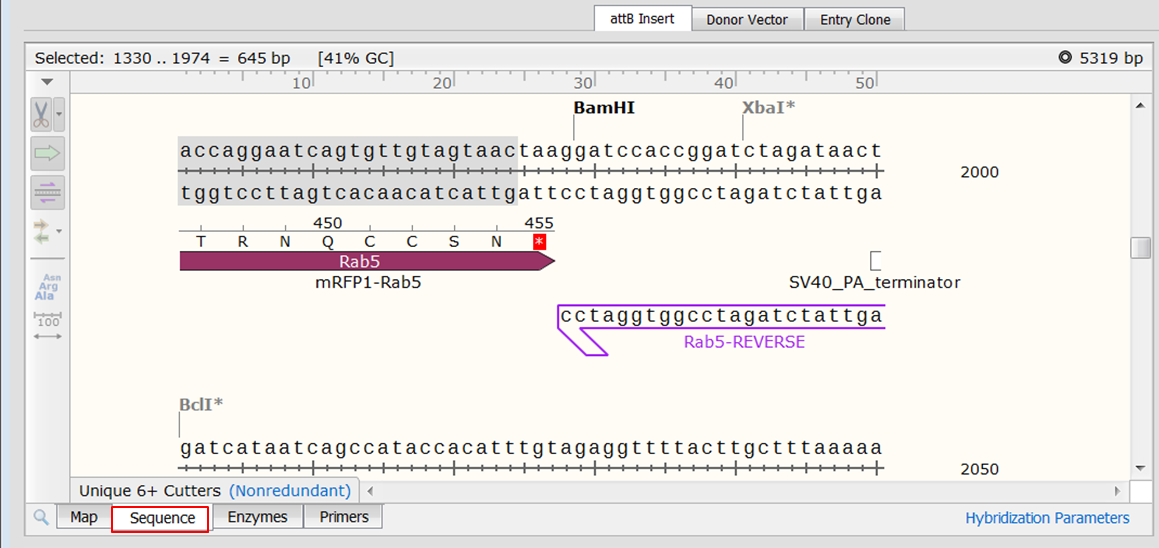
| The vector contains a GFP gene which will be fused to the C-terminus of Rab5. This means we need to avoid including the stop codon of Rab5. Open the Sequence view to select the insert. Select the start codon and scroll down to the end of the CDS. End the selection with the final codon in front of the stop codon.
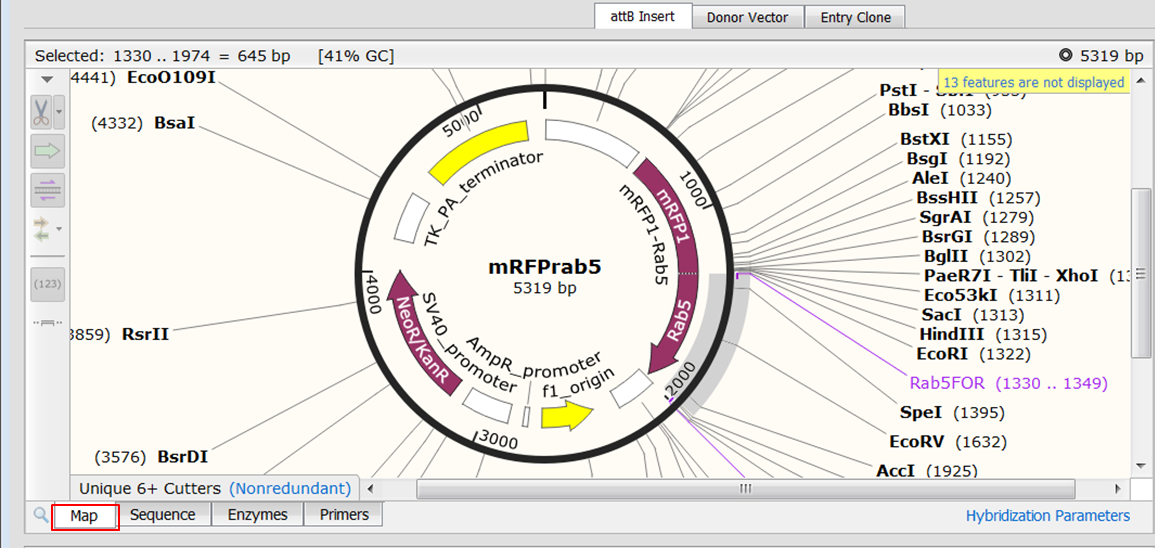
When you switch back to Map view the entire CDS of Rab5 is selected. |
Select the donor vector
| Select the donor vector |
|---|
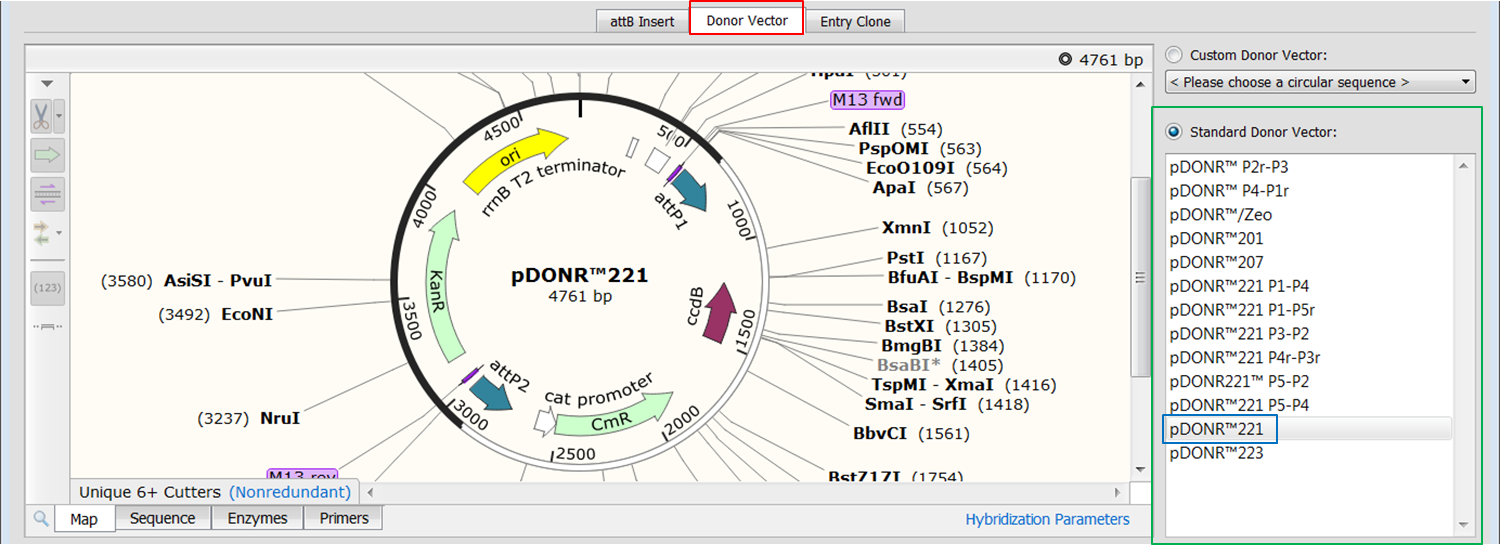
| Click the Donor Vector tab (red) where the vector that was loaded when you opened the cloning editor (mRFP1Rab5) is automatically opened as the source of the insert. From the list of Standard Donor Vectors (green) select pDONR211 (blue). |
Design the primers
You need primers to amplify the Rab5 fragment with attB1 and attB2 sites so that it will recombine.
| Design the primers |
|---|
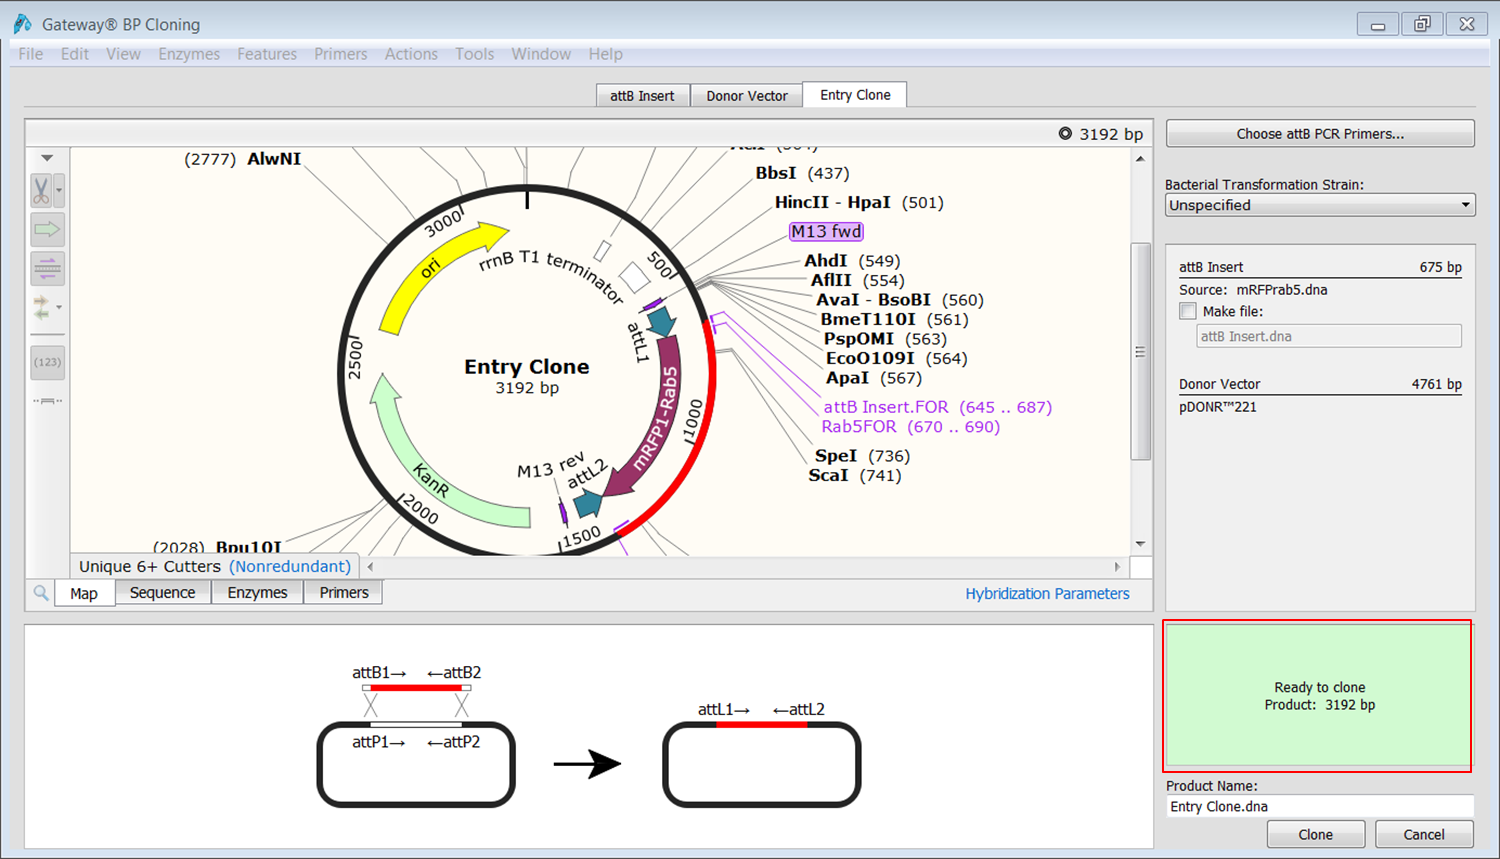
| You can enter the primers manually in the attB Insert tab. But it's much easier to let SnapGene design them for you. Click the Entry Clone tab (red) and click the Choose attB PCR Primers button (green).
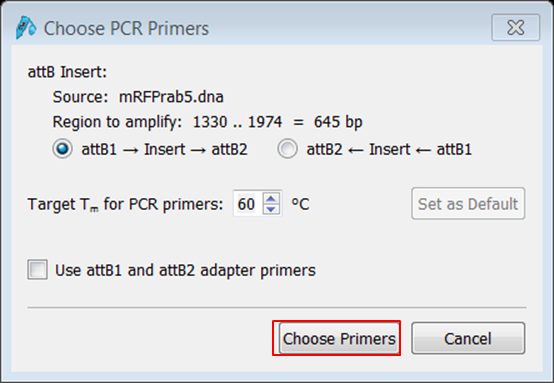
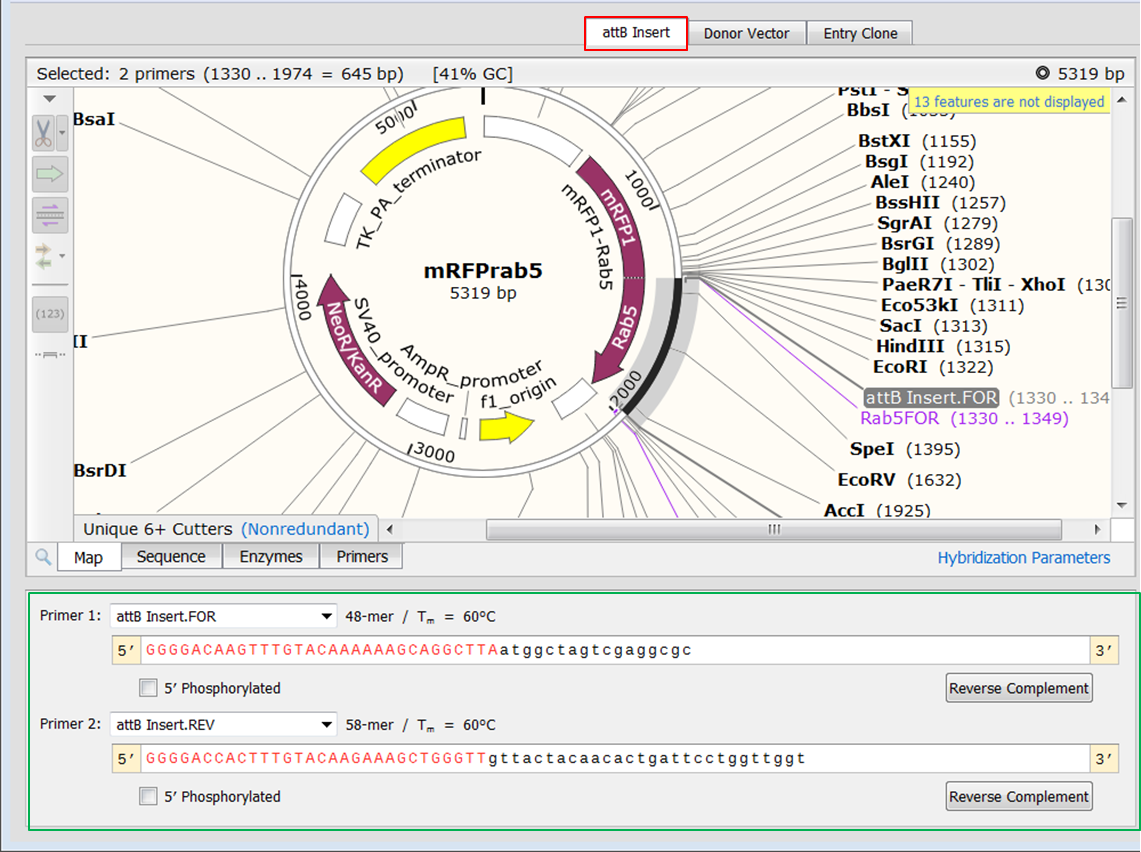
Use the default settings and click Choose Primers To see the primers go back to the attB Insert tab (red). At the bottom you see the sequences of the primers (green). The red parts are the attB1 and attB2 sequences. |
Perform the BP Cloning
At this point SnapGene tells you it's ready to clone.
During the BP cloning the attB sites of the Rab5 fragment will recombine with the attP sites in the donor vector.
| Perform the cloning |
|---|
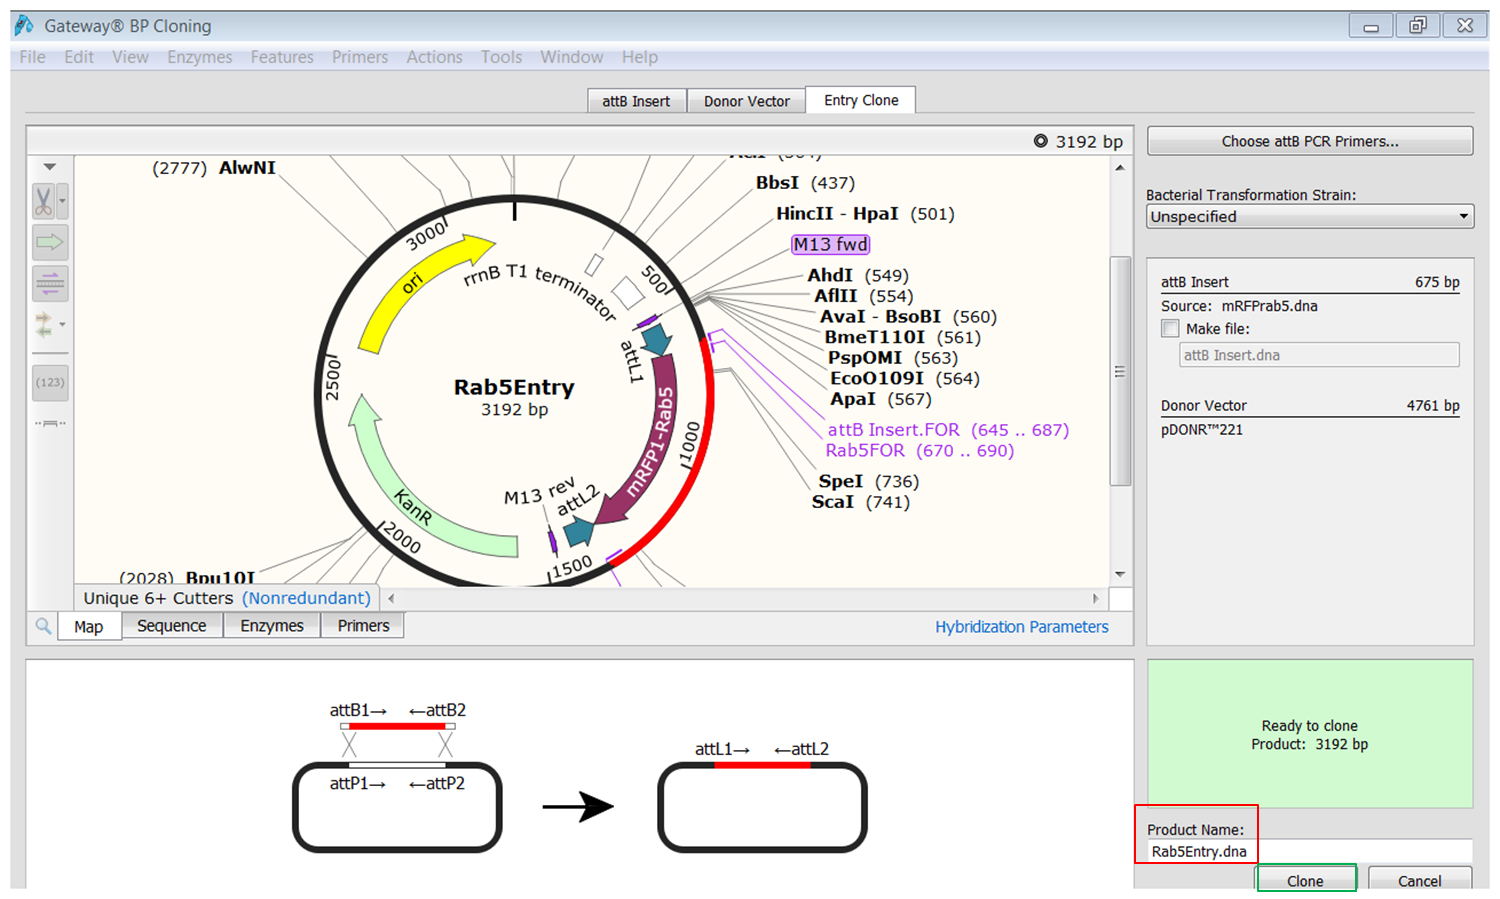
| Type a name for the product in the Product Name box at the bottom (red) and click Clone (green) to create the entry clone. |
Show a graphical overview of the cloning procedure
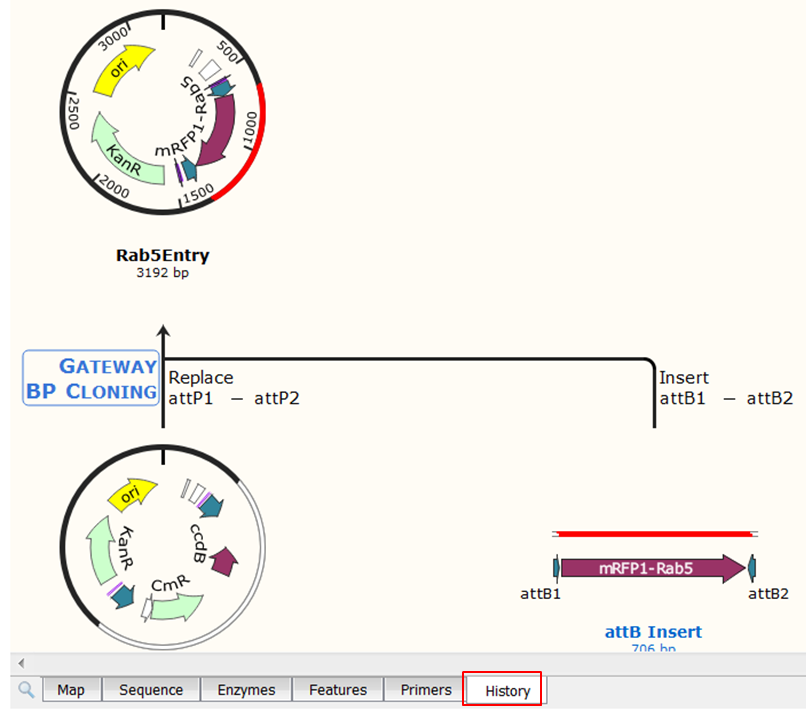
| Show a graphical overview of the cloning. |
|---|
| Open the History view of the entry clone. |
Transfer fragment from entry clone to destination vector
The next step is to transfer the Rab5 fragment from the entry clone into the destination vector using the LR reaction.
Open the cloning editor
| Open the cloning editor |
|---|
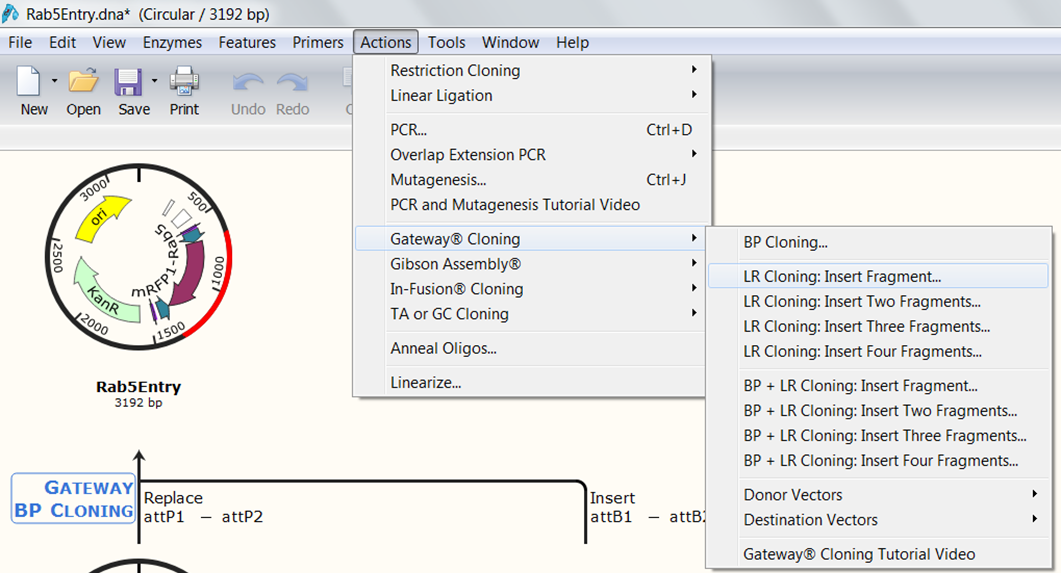
| Expand Actions in the top menu, select Gateway Cloning and then LR Cloning Insert Fragment. |
The entry clone is automatically selected.
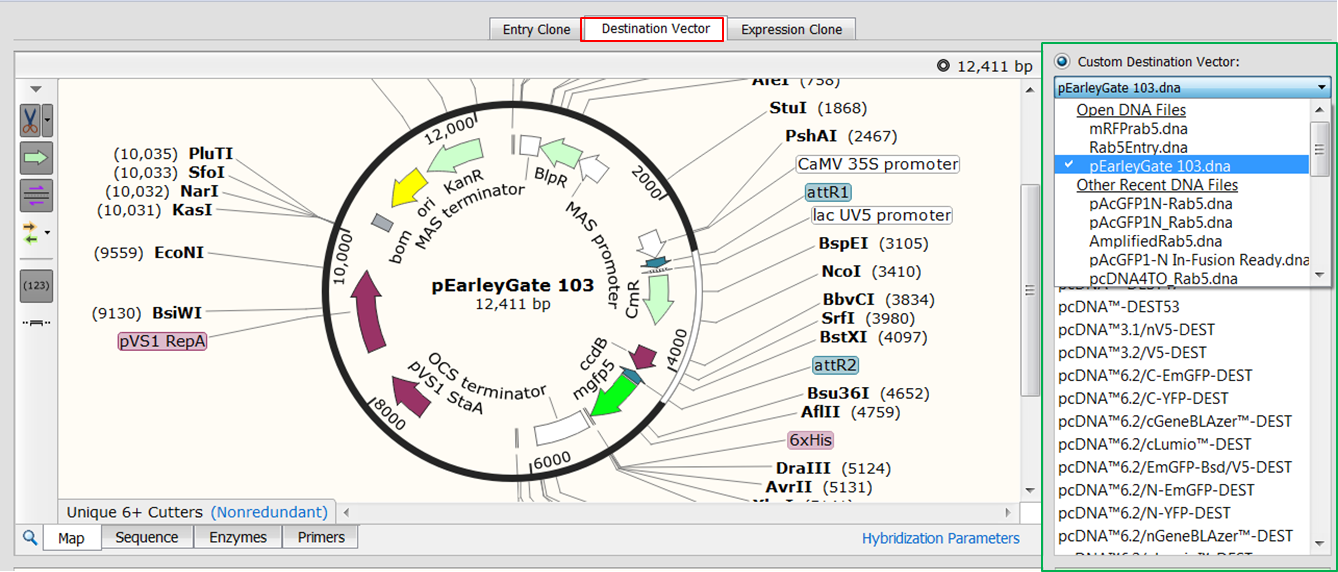
Select the destination vector
| Select the destination vector |
|---|
| Click the Destination Vector tab (red). The reason why I chose this plant vector is that's it is not included in the list of Standard Donor Vectors. But this is not a problem: from the list of Custom Destination Vectors (green) select pEarleyGate 103. |
Preview the result
| Preview the result |
|---|
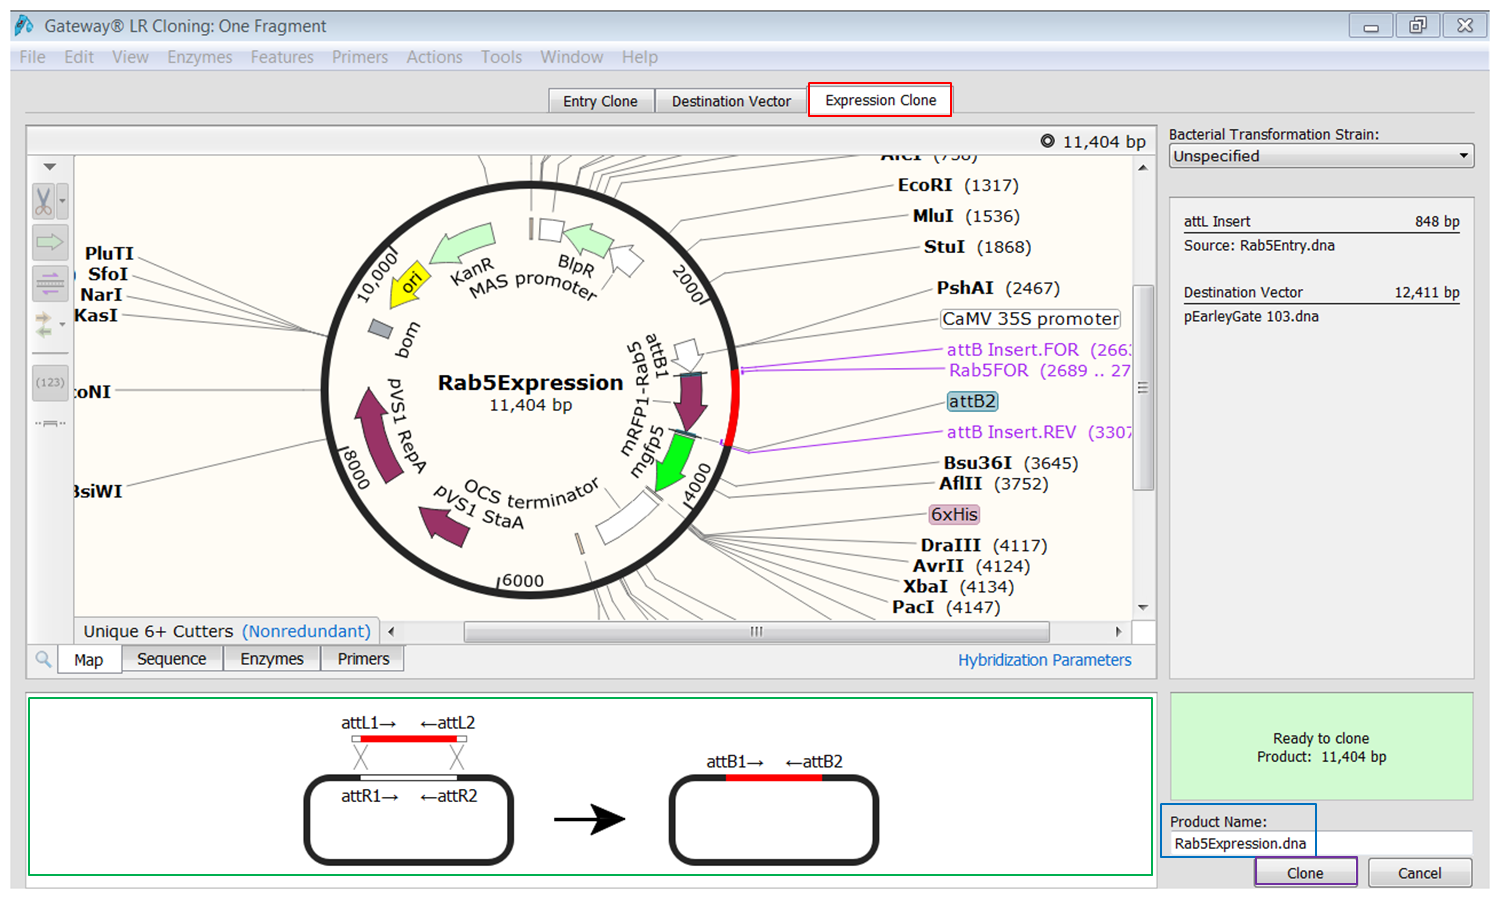
| Click the Expression Clone tab (red). The overview at the bottom (green) shows that the attL sites in the entry clone will recombine with the attR sites in the destination vector. |
Perform the LR reaction
| Preview the result |
|---|
| Type a name for the product in the Product Name box (blue) at the bottom and click Clone (purple) to create the product. |
Inspecting the result
| Inspect the joining site. |
|---|
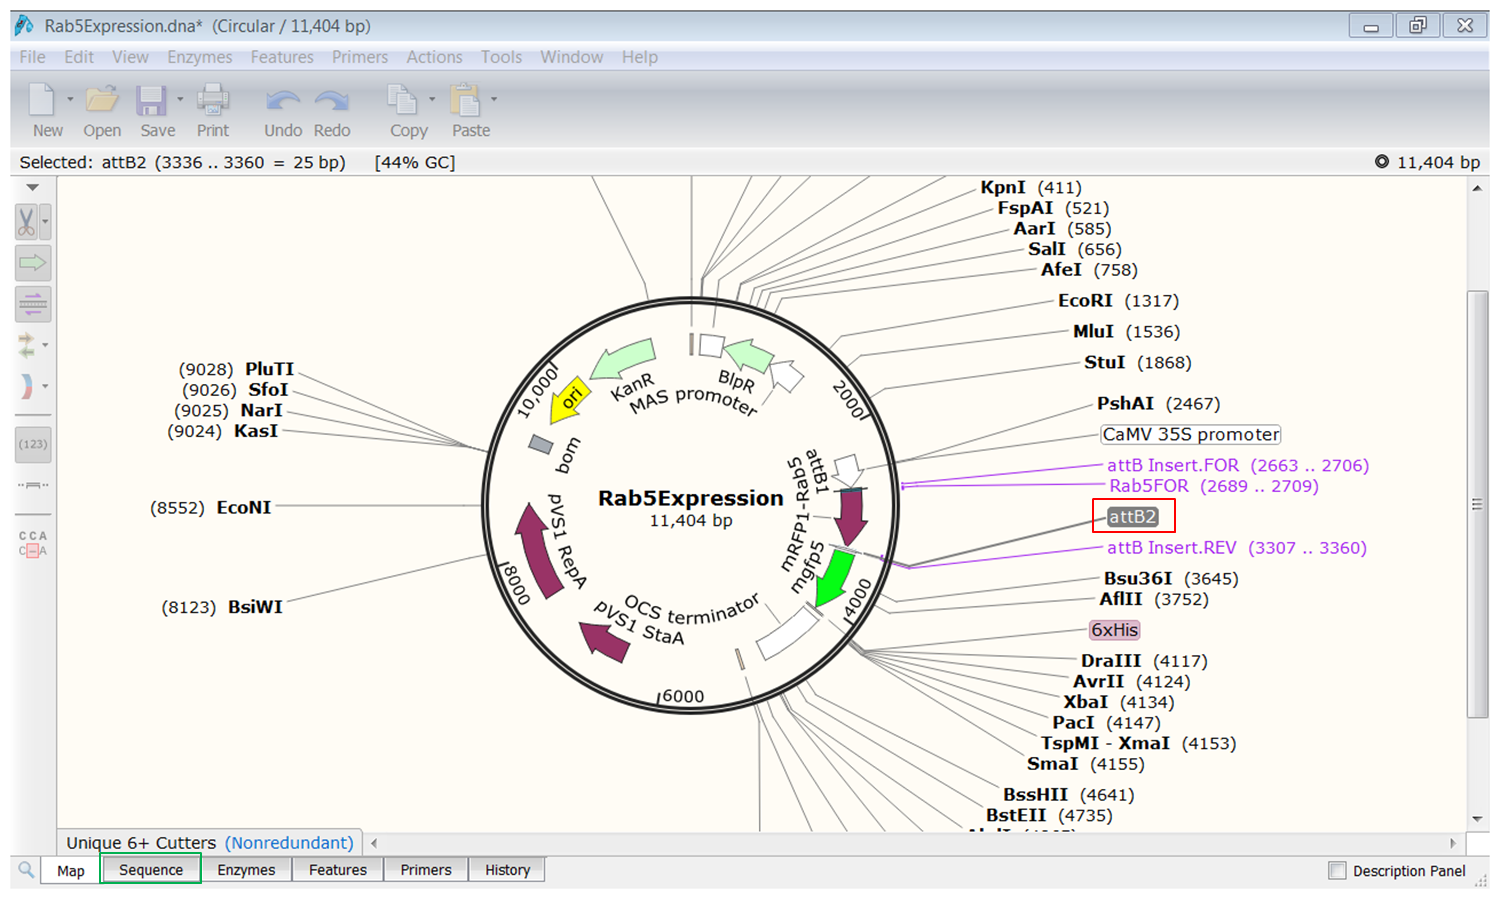
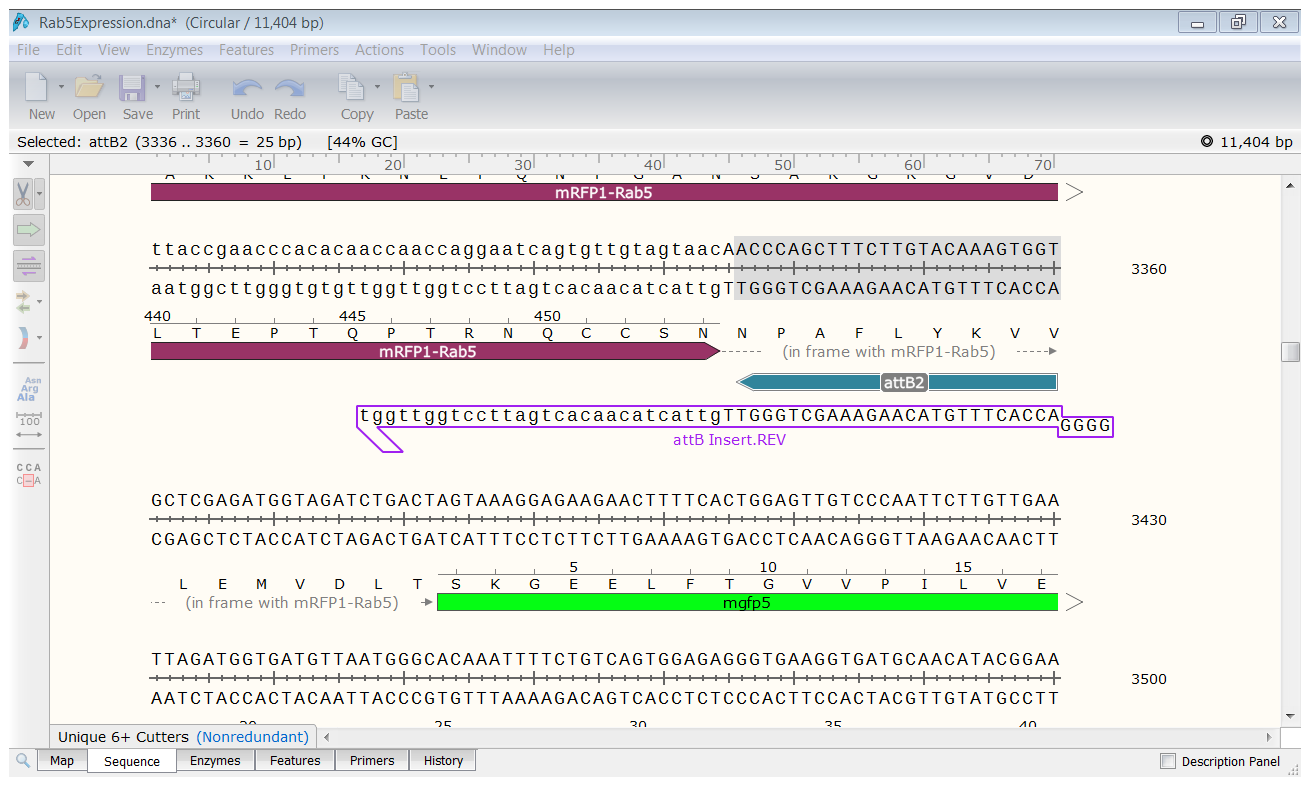
| Click the attB2 feature in the map (red) and open the Sequence view (green).
You see that Rab5 is fused to the GFP gene by an in frame linker. |
In this example we have cloned a single fragment via Gateway cloning but you can simulate Gateway cloning of up to 4 fragments in SnapGene.
See this video tutorial of Gateway cloning in SnapGene.
